Friday, August 20, 2010

This is my kind of Tweet!


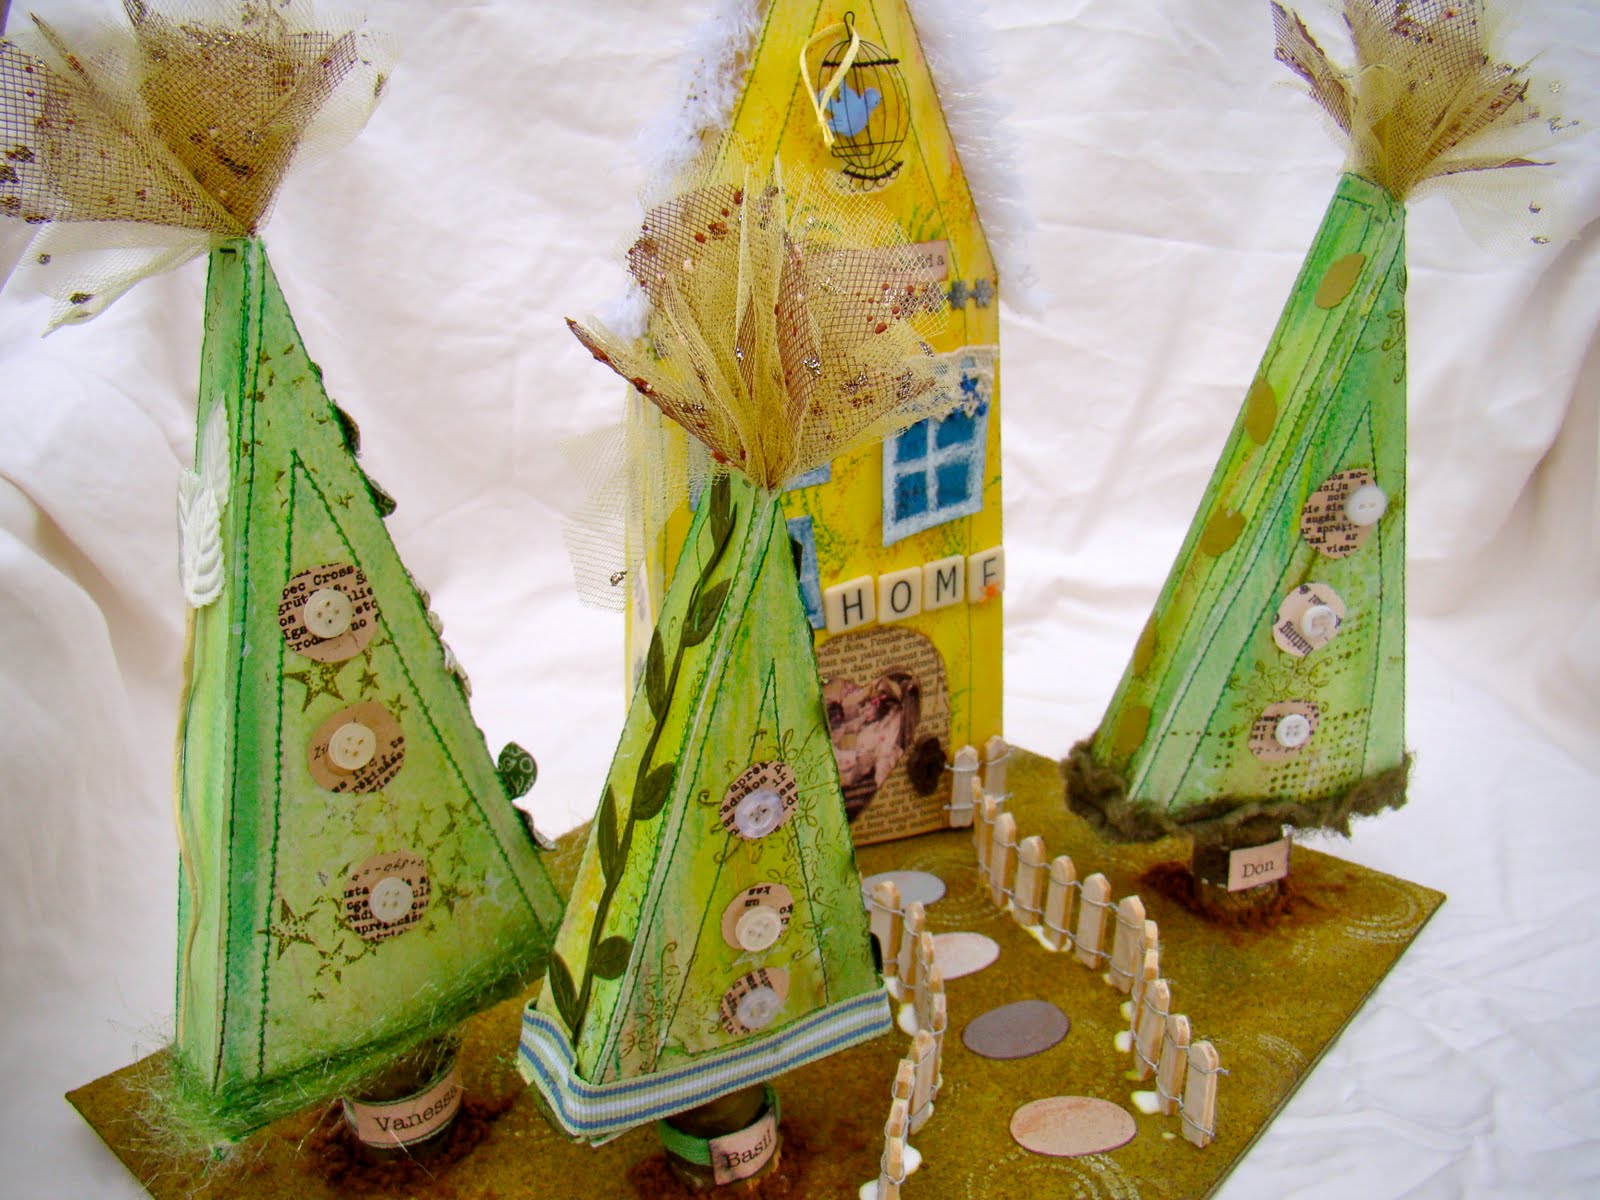
I'm sorry to say, I am not a Tweeter. Maybe it's because I was so into the whole IM thing when it first came out in the 90's and I'm just kind of over it. Really, I'm just not that interesting on a moment to moment basis! These two pieces were inspired by Claudia Hellmuth, who is one of my favorite artists. I just love her whimsy and she was actually the first to inspire me to mixed media when I saw(and now own) Collage Discovery Workshop in a bookstore.

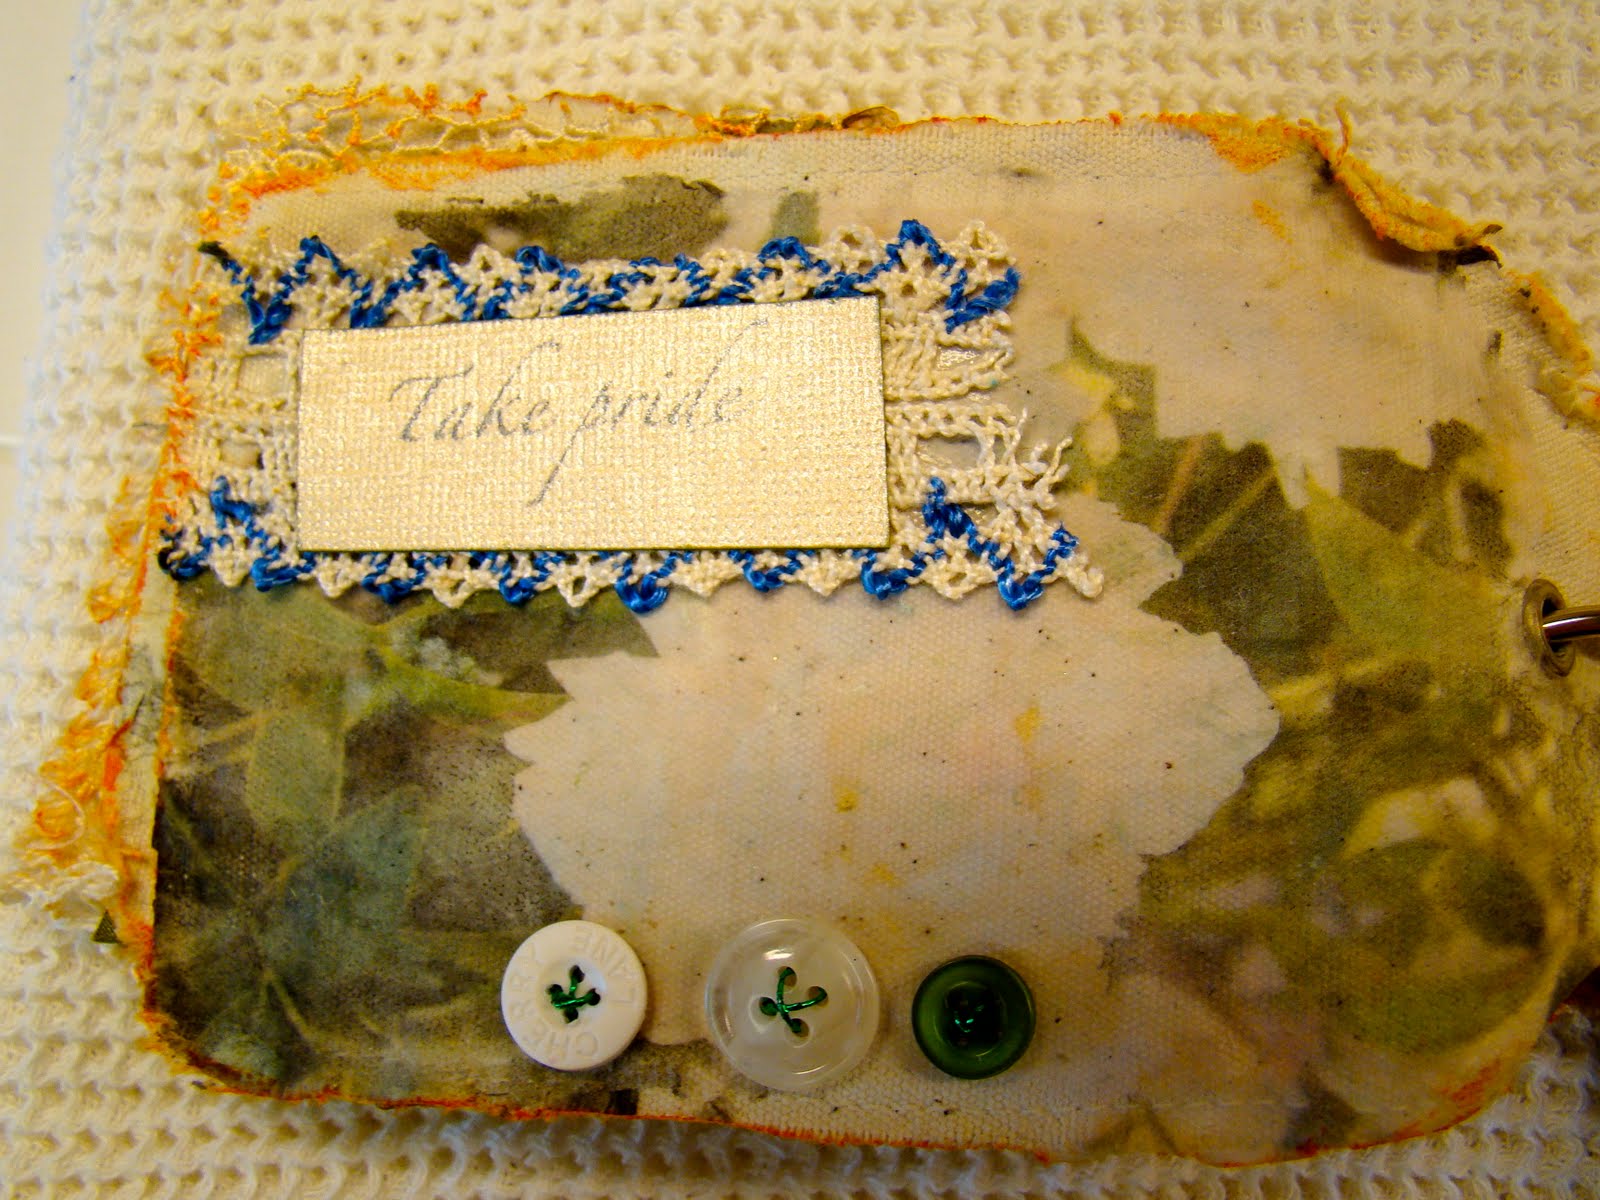
You can see how to make these pieces in Somerset Apprentice (Vol. 1), so I won't go into the details. However, I will tell you that the edgework here was an accident. I used painter's tape to cover the top of the canvas so that I could get a clean line when I painted the sides black. However, I had too much water on my brush and the black seeped onto the top of the canvas. Rolling with it, I just added some swirl stamps to the edge on top of it and ended up loving the look! This completes #17 of Project 52.

Do you redo things when you make mistakes? Or do you just embellish and adapt them like I do?

Sunday, August 15, 2010

Groovy Baby!

Oh what a lot of fun this was! The perfect opportunity to use all those gaudy, bright colors in one piece! This piece was inspired by Shelley Ozbirn. Her 1970's assemblage piece was featured in Cloth, Paper, Scissors (Sep/Oct '09). And so, I created #16 of Project 52.

I was fortunate in doing mine as I had been to a '60's inspired New Year's party this year. We were given party trinkets of necklaces with musical notes and mini, vinyl records. Also, my fiance received (and wore proudly and comically), a pair of guitar glasses. I sawed off one guitar; it was the perfect size here.
The pants are made with various strips of cardstock, mini paper flowers, and Stickles. The belt buckle are cut from an old black leather jacket.

The background was created using thick white acryllic, which was then stamped in and textured with various objects. I drew the word 'groovy' and some peace signs into it. Then when dry, I painted a couple different washes over it and stamped again with stars. Black Stickles were added to the peace signs and word. Naturally, I used the necklaces for a hanger and attached the mini record to the bottom.

One of the most fun parts of this project for me was researching the '60's! This is a fun way to celebrate the year of your birth and find out what life was like then.

Tuesday, August 10, 2010

Paper Dolls

If you want a quick, fun project to do by yourself or with kids, I recommend Sandra Evertson's book, Fanciful Paper Projects. You just need to copy, cut, and glue. Of course, if you're a little more ambitious and creative; add some of your own embellishments. Here's a closer look at Violet.
And Second Prize.
And lastly, Narcissus.
They are 'hanging out' on my bulletin board cheering me on to create. I also made this lovely Prima Ballerina.
Instead of using the paper cut outs, I added my own beads and glitter to her crown,

and to her dainty feet.
I just love the paper flowers that Sandra included. I also chose to color in the dress a bit and (of course) add more glitter glue!

And that's it, #14 and 15 of my Project 52. Short and sweet!

Monday, July 5, 2010

Family Trees and Free Templates

I hope you all enjoyed a fun 4th! We actually went to see 'Knight and Day'; which I thought was a lot of fun! Today I have #13 of my Project 52. This was inspired by Coleen Sohn's 'Making Roots' in Sew magazine. You can visit her blog here. Don't you just want to walk up the cobbled path and visit?
Basically, you cut out the shapes onto watercolor paper and stitch them onto stabilizer. Then glue the pieces together and paint and embellish them. They are then stuffed and the bottoms closed. I assembled mine a bit differently than Coleen and have included the templates that I made at the end of this post.
I thought you might like to see a few close ups of the details(I always like looking at those on other people's projects!). The trees sport the names of myself, my son, and my fiance on their trunks.
I popped up one of the windows and added some lace.
Quotes were added to each side of the house.
Each tree was embellished slightly differently to reflect the personalities. For instance, this one has flowers to be more feminine(me).
Rather than have the pieces stand alone where they would surely be knocked over by a breeze or fan, I chose to create a 'yard' for them and glued them on.
Here are the templates if you would like to create your own 'family trees'. Have a great day! You could just print different sizes of trees for wee ones etc. Just right click on them to save them to your computer and print in whatever size you like.


Saturday, July 3, 2010

It's All About Color and Light and Giveaway Winners

First my giveaway winners. Birgit and Lori. Congratulations and thank you so much for visiting my blog!

Next, clear the air. Well, needless to say, I have been remiss in posting for a few weeks. I am suffering from overwhelming BLOGGERS GUILT; which then makes me feel less like posting. It seems that I like the IDEA of posting but not the actual sitting down and doing it. I guess it's the sitting part--I'm not good at that--never have been. I start and then get side-tracked. Today I'm throwing the guilt out. It is what it is and I am what I am.
Next, part of the reason for my absence that I have mentioned earlier. Spring cleaning and redecorating. Primarily, I had an overwhelming need for color and light in my home. Mainly, (in the interest of not spending loads of $) I've been making throw pillows, lap blankets and linens. To the family room/kitchen/dining area I have added these colors(see above also).
 More importantly, I took the shaker blinds out of the family room. They are very nice, for sure, BUT, I need more light! Before:
And I put in curtains, leaving the frame behind which is covered by the window treatments.

To the living room, I added yellow to the already existing red accents.

I can't emphasize how much adding light and color has done around here! I feel more energized and Don seems to love to come home to a happy atmosphere!
And now, a sneak peek at a project that I was hoping to post today but is not ready. I'm shooting for tomorrow now but I'm off to see the new Twilight movie. Did I mention that I keep getting side-tracked?
"See you when I see you". Have a great day!

Monday, June 28, 2010

Nature Lessons

First, don't forget to leave a comment here for my June giveaway! Second, I'm so sorry that I have been a bad blog host. In truth, I have been spring cleaning, redecorating and painting. It all seemed like a simple plan but turned out to be so much more work than I thought...and I'm still not done and losing steam. Anyway, here is the result of #12 of my Project 52.

I began with a small canvas album from 7 Gypsies. To this I added images from my nature photos and some vintage bird postcard images. After researching a bit, I decided that using gel medium was the easiest method. You simply cover the canvas with it and also the face of the image. Lay the image on the canvas and press down, preferably with a brayer.


After it dries, you run it under water and rub the paper off leaving the image behind. I was really tickled with the results, it was fun to do!


Lace and trims were added, some vintage, some new.


And also, some phrases that I think of when I observe nature on my daily walks.

I inked around the edges of all the pages with one color to unify it a bit more.


I got creative with the buttons, deciding to attach them with wire and I really liked the effect.


And here is the back cover. This project was inspired by Caterina Giglio whose project was published in in the Winter '10, Sew magazine issue. You'll find wonderful nature photos and mixed media projects on her blog!

I threaded a piece of vintage lace trim over the binder ring.


And lastly, wired a few bird charms to a piece of vintage lace that I had allowed to hang over the edge of one page.
Have a wonderful day, I'm off to spring clean my bedroom!

Saturday, June 12, 2010

"Appeeling" Pizza Peel

I've been meaning to do something with this pizza peel that I had shoved down between the fridge and the kitchen cabinet for about 2 years. Finally, I had the confidence and skill set to do what I wanted with it! This was fun to make and looks great hanging in my kitchen now. 
Though I do love to cook, once in a while...ya know? So I just had to use this cheesy old joke.
All of the papers that I used here are from Graphic 45; which I adore. Who doesn't? Not being able to bear wasting any paper from this line, I was able to use up a great deal of my scraps. First I layered bits and pieces of paper over the entire peel using some Glossy Mod Podge that I got on clearance. Normally, I would go for a matte gel medium here but I knew that this would be covered later and I could save the more expensive medium for the final coat.
Next, I used a Tim Holtz fleur-de-lis border mask and some distress ink to help the papers blend together with no one in particular standing out. I did not do this to the handle of the paddle that I needed to stand out a little more to balance the piece later.
To further blend the background together, I added two layers of white tissue paper with gel medium. You have to allow the first to dry before adding the second. Again, I omitted this step with the handle.
Next I stamped my words.
The flowers were created using more G45 scraps and punching flower shapes, then inking with distress ink.
I arranged these punched flowers in groups of three to five then stacked various other left over flowers and buttons to their centers. Some of them I curled up a bit using a pencil to add dimension.
The man and woman images were cut out of some of the papers and adhered and the whole piece was coated with gel medium to preserve it. After it dried, the flowers were glued on using Tacky glue, also adding some leaves.
The clunky vintage button I've had around for ages finally found a home! It was perfect for this project. Last, I outlined the people and their words with a Sharpie to help them stand out.
I finished it off with a bow around the handle, a piece of gold trim through the hole. The tiny bouquet of mini roses above the stamped words were added as an after thought to keep your eyes focussed into the piece.

And now, I would like to remind everyone to leave a comment on my previous post about where you find inspiration so that you have a chance to win my random Giveaway. Good luck and have a fabulous weekend!

Cards That Pop!

   Black makes colors really pop, there's no doubt about it. It's why we go to the classic 'little black dress' for spec...