Wednesday, February 18, 2009

N is for Nanny

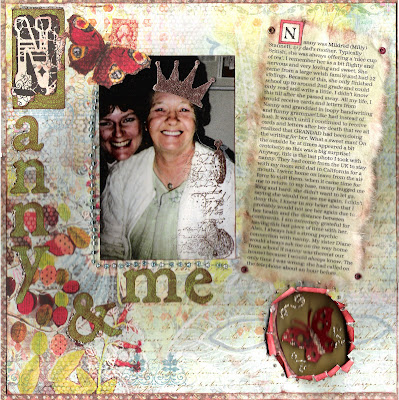
Nanny was my name for my grandma. I left England when I was about 7 and saw her again when I was 15-16 when I went back for a short time. The next time I saw her was when her and my grandad came to stay for a month with my parents when I was around 20. I am working on leaving little stories for my son since he did not grow up around much family and knows little of his English ancestry. Here is a layout I did using the Que Sera Sera collection from K and Co.
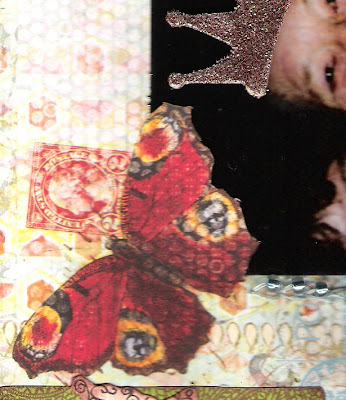
In this detail, the paper already had a butterfly printed on it so I used my craft knife and cut around it and inked it as a 'photo corner'.
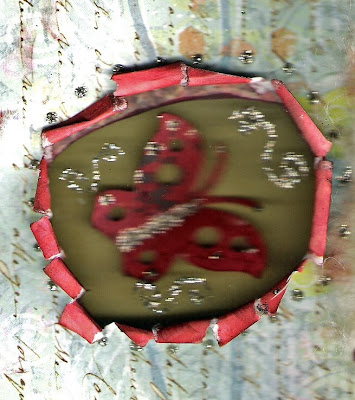
Here I made a shadow box. First cut a hole. Tear edges and ink to distress if you wish. Glue a piece of acryllic to the back of opening. Alternatively, you could do what I did and recycle a piece of that 'try-to-open-it-with-a-knife-then-get-the-kitchen-scissors-pull-grumble-tear-grumble-louder-and-STILL-have-to-go-get-your-man-to-help-you-open!' plastic packaging(you know the kind). Place a cut out shape (butterfly here) onto a contrasting piece of cardstock. Stick on with foam squares: Here I stacked them three high. Sorry, the scan got a bit fuzzy here.

And lastly, for those who like to read the journaling; here is what it says:

Nanny was Mildred (Milly) Stannett, my dad's mother. Typically British, she was always offering a 'nice cup of tea'. I remember her as a bit flighty and nervous and very loving and sweet. She came from a large welsh family and had 12 siblings. Because of this, she only finished school up to around 2nd grade and could only read and write a little. I didn't know this till after she passed away. All my life, I would receive cards and letters from Nanny and granddad in loopy handwriting and funny grammar(Like had instead of has). It wasn't until I continued to receive cards and letters after her death that we all realized that GRANDAD had been doing the writing for her. What a sweet man! On the outside he at times appeared a bit crotchety; so this was a big surprise! Anyway, this is the last photo I took with nanny. They had come from the UK to stay with my mom and dad in California for a month. I went home on leave from the air force to visit them. when it came time for me to return to my base, nanny hugged me long and hard. she didn't want to let go, saying she would not see me again. I didn't deny this, I knew in my heart also that I probably would not see her again due to her health and the distance between continents. I am extremely grateful for having this last piece of time with her. Also, I always had a strong psychic connection with nanny. My sister Diane would always ask me on the way home from school if nanny was there(at our house) because I would always know. The only time I was wrong; she had called on the telephone about an hour before.

Monday, February 16, 2009

I is for Imagination

Well, I have finally delved into 'old' photos in scrapbooking. For the past 2 years that I have been learning to scrapbook, I have only done current photos. I guess the poor quality of the old ones (mainly taken with disposable cameras and no clue about photography), was off-putting. The other thing is that it makes me a bit sad to reminisce, I prefer to live in the moment. However, I do want to leave my son with some family history, and so I shall.
This was really fun as I picked up tons of new things at the Costa Mesa Scrapbooking Expo. OMG! That was so much fun! I have never been to one before and you can bet that I'll be looking for others nearby!

Thursday, February 12, 2009

Valentine's Cards for Home and School!

I make a lot of my own cards and I always like to try different things. Here I made one for my sweetie and my son that uses some unusual elements.
Also, below, I have a cute one that is both a card and a gift to do in your classroom or at home with your kids. It's a great way to use up your patterned paper scraps. If you're like me; you have a lot of them around! The kids really love all the colors and patterns and often, I am tired of them. (I always want NEW papers with all the exciting new patterns and colors that I haven't tried yet!) I'll get to that in a minute, let me show you the first card up close.
On the top photo, I simply made dots of glue and added micro glass beads. I never used those before and I really wanted to see how they looked. I plan to stick them on glue dots next time I use them. On the bottom photo, I wanted to show you the unusual element in red. Can you guess what it is? It's actually a piece from and onion bag. I like how funky, cool it looks. What do you think?


The hearts were punch from cardstock then stamped. After that I inked the edges and covered the entire thing with dimensional glaze. Before it dried, I sprinkled a little glitter on them.

Ok, so here is the kid's card. What I like about it is that is relatively easy to do and if you have younger ones, you can cut the hearts and even make the card base for them. They could always put stickers and whatever else you like on them.

You need:

glue stick
tape
construction paper
glitter or other embellishments
markers
scraps of patterned paper, cardstock, or more construction paper

Just take a piece of construction paper and cut it lengthwise (below), then fold each piece in half. Tape the two together to make an accordian card. Cut out 5 hearts. What I do is make a template out of cereal box cardboard; then I employ willing students to trace that and make a few more. We share them and I don't have 15 students overwhelmed with the idea of trying to cut a heart freehand! They can trace the heart onto the papers they want. Glue the front heart down completely(above).


For the inside 'pages', have students only glue on the "V" part of the heart so that the top stays open. They can now insert little notes into them. They could write 'coupons' or reasons they love their parents or other family members. It's fun to cut them with decorative scissors too! You could even tuck a photo in one heart. And don't forget to have them decorate the front! If you use glitter, try having them do that over some type of tub or box lid so that they don't waste so much of it and your carpet isn't permanently glittered! But, maybe that wouldn't be so bad...Hee hee.

Wednesday, February 11, 2009

Valentine's Tin

If you are like me, you save those cute mint tins for something(they're so cute, aren't they?). It's tradition that I make my sweetie something for Valentine's Day. It started because I just couldn't afford to buy him anything nice and I thought, 'what is nicer than something that I took the time to make?'. This project is really cute and relatively easy. It holds cards with Valentine's 'gifts'. Mine have things such as 'free foot rub', 'breakfast in bed', etc. You'll need:

sandpaper(any)
gesso
acryllic paint
scraps of patterned paper, cardstock
embellishments: ribbon, lace, gems, chipboard, etc.
adhesives
pens

First, lightly sand the tins so they take the paint. Paint with a layer of gesso(it works like a paint primer to help your paint 'stick' and look the right color). Then paint with Pepto Bismol, just kidding, it just happened that my paint mix ended up looking like it!

Next, decorate the top and inside however you like. I just used the base of the tin to trace the shape on patterned paper to fit inside my lid and base. I inked the edges before I placed it in. Double sided tape worked well here. Glue dots hold the rest. Then I added lace, chipboard, stickers, a punched heart, tag, gem, vellum flower.


Here's the detail on the lid. This was a fun experiment for me. I cut a piece of patterned paper, then punched it with a corner punch(I think it looks like a butterfly) and backed it with contrasting cardstock. Then I inked the edges. Last, I covered the whole piece with Crackle accents. It didn't exactly crackle on the paper, but I still think it made a cool effect!

Last I cut bits of patterned paper and glued them with white glue onto pink cardstock. Then I wrote my 'gifts' on them. Voila! Just place them in the tin for a lovely hand made gift!

Monday, February 9, 2009

Make a Classroom Mailbox

Well we are all thinking about recycling and want to encourage it with out students also. Many of you have Writing Centers or a classroom mailbox. Here is one you can make with recycled cardboard and scraps from your card-making or scrapbook supplies or even your classroom craft paper. Here are the steps:
1. You'll need to print the templates for the base, top, and back. Just recycle the back of some printing paper and cut them out first.
2. Trace pattern onto cardboard. I used the backing from a pack of cardstock. I think a cereal box would be great to recycle here also. Hint: Score the cardboard where shown with a craft knife or scissors so it folds straight for you.
3. Trace pattern onto patterned paper twice. Note: You may find you have to trim the inner pieces slightly to get them to fit.

4. Tape the pieces together using masking tape on the inside and outside for strength. Don't worry too much about neatness; it won't show later. I am not a perfectionist so I find ways to compensate! Hee hee.


5. To hide imperfect edges ink all of them now. I found that it worked great to use a foam brush dipped in the ink to get the inner edges.


6. Now glue or use double-sided sticky tape to cover the mailbox. TEST the inner pieces first! I had to trim them slightly smaller to fit due to the tape and tabs. Also, cover both sides of your flag and do the same to the edges.

7. Now we cover our imperfections! Sand all the outer edges. Then ink them again.

8. Punch a hole through the flag and your mailbox where you want it and attach it with a brad.


9. Embellish! Add words, ribbon, stickers, gems...whatever! Hint: I ran wide ribbon through my Xyron and stuck it to the front edge overlapping to the inside for durability. (See top photo.)


Now you have a cool mailbox to add to your classroom! Stay tuned for Mail/Writing center ideas in the future. I liked it so much that I'm making one for home too!

Pretty Cards


I haven't posted as much as I thought for two reasons. 1.) Our new PC has a malfunction in it's card reader, yet to be resolved. 2.) My 'good' camera remains 3,000 miles away in Chicago where Big D left it at his daughter's. But, being resourceful I will post limited things that can be scanned.
Last week, a nice lady, Margie, invited me to a Stampin' Up! party at Kristi's while I was shopping at Michael's crafts. Thank you Margie! Here are some pretty cards that we made.

One of the ladies had the cute idea of stamping the matching stamp on the outside of the envelope. I thought it was darling so I had to do that too!
It was fun to meet some new friends whom now I am planning on going to a scrapbook expo coming up. More on that later! So excited! New goodies! Speaking of goodies, when my new stamps come that I ordered at Kristi's, I'll share them with you.

Monday, February 2, 2009

U is for Unexpected

I feel so lucky to have found love again as a single mom, later in life. On this page, I wanted to use the cool alpha cards I got. This gave me the idea to create a page for each letter.

I once had my 4th graders draw and write about something they learned or did during the year. We put all the pages together on a giant poster. It was really a great wrap up for the year and I think they all felt proud when they were reminded of everything they had done that year.


Vanessa S.
JellyMuffin.com - The place for profile layouts, flash generators, glitter graphics, backgrounds and codes

Cards That Pop!

   Black makes colors really pop, there's no doubt about it. It's why we go to the classic 'little black dress' for spec...